'New Beginnings' papercut design featuring the sparrows that are nesting next to my studio window, this would make a perfect new baby gift!
Now available to download the template to make your own!
https://www.etsy.com/uk/listing/233631329/papercut-template-pdf-new-beginnings?ref=shop_home_active_1
Showing posts with label birds. Show all posts
Saturday, 16 May 2015
Thursday, 22 January 2015
All You Need is Love
Its definitely that time of year, love is in the air, and my pencil has been going crazy. Fancy cutting this template as a valentine's gift? It was actually quite easy, much easier than the previous design I did, took about 2 hours to cut out and only 4 blades in my knife. Here are a few progress photos.
Link to purchase the template from Etsy
https://www.etsy.com/uk/listing/219593568/papercut-template-all-you-need-is-love
IMPORTANT ANNOUNCEMENT
I've got quite a few enquiries in my inbox and via Etsy. I promise I will respond to them when I get a chance, i'm not ignoring anyone, I just don't have enough hours in the day at the moment with the designs I'm trying to complete ready to sell in my shop and other work commitments. I'd love to employ someone to answer emails and keep my paperwork up to date but that's just not going to happen quite yet, so its just me! x
Link to purchase the template from Etsy
https://www.etsy.com/uk/listing/219593568/papercut-template-all-you-need-is-love
IMPORTANT ANNOUNCEMENT
I've got quite a few enquiries in my inbox and via Etsy. I promise I will respond to them when I get a chance, i'm not ignoring anyone, I just don't have enough hours in the day at the moment with the designs I'm trying to complete ready to sell in my shop and other work commitments. I'd love to employ someone to answer emails and keep my paperwork up to date but that's just not going to happen quite yet, so its just me! x
Saturday, 20 September 2014
Practice Makes Perfect Papercutting Tutorial
I've designed a new template with the phase 'Practice Makes Perfect' to illustrate how I go about creating each design. I've had requests to give some tips on cutting and also to show my process.
Most designs generally start with setting out the type on the middle of the page. I usually choose a typeface I'm particularly passionate about at the time (I love curly swirly typefaces and always looking to add to my collection!) So at the moment its Breathe Pro (available from myfonts.com).
Then I will start designing around the type. I normally have the design in my head but sometimes I just let the pencil flow (yeah ok that sounds a bit daft but really it does work!). Changing the swirly endings to the letters helps to join up the letters that seem to float and aren't connected in anyway, but also just adding a simple 'bridge' helps to keep everything together.
After spending about an hour with the pencil I will then scan it in and start tracing the design in Adobe Illustrator. Here I can control the line thickness, add my signature birds and manipulate the type so any final pieces join up where needed. Using the path finder tools and converting all type to outlines I will then join everything together so I have an outline to cut from. This can then be converted into a file for the Silhouette Cameo or printed to cut by hand. In this tutorial I will be showing you how to cut it by hand.
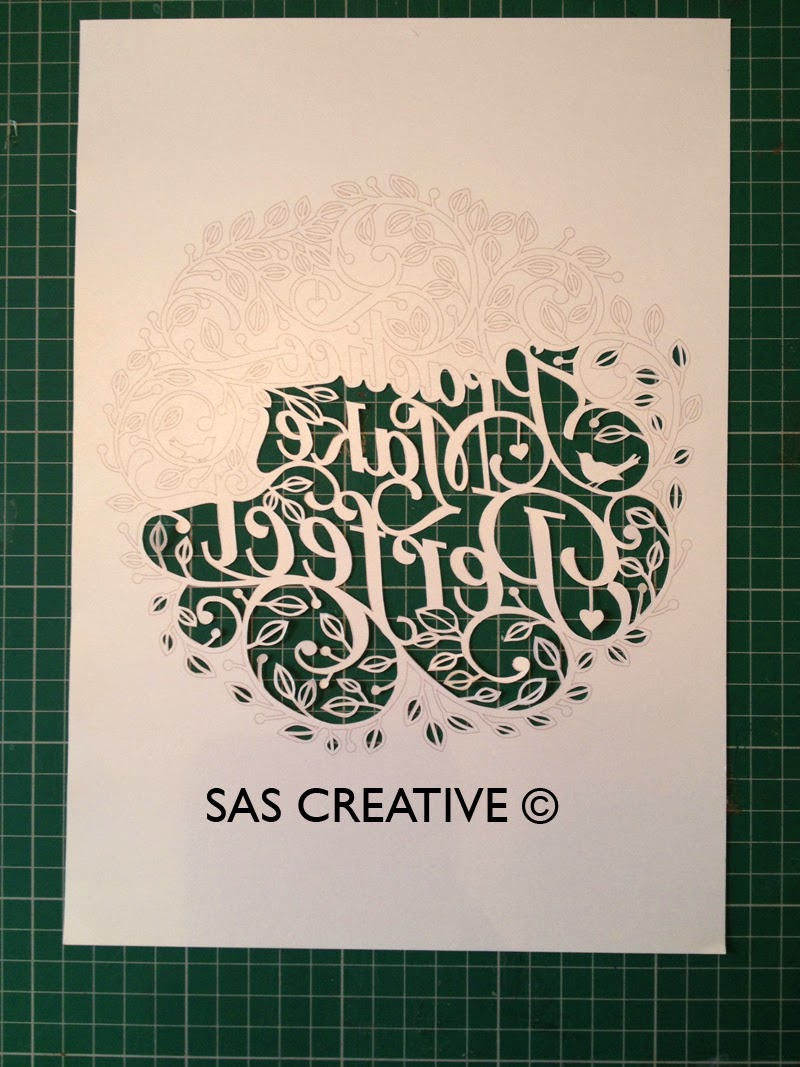
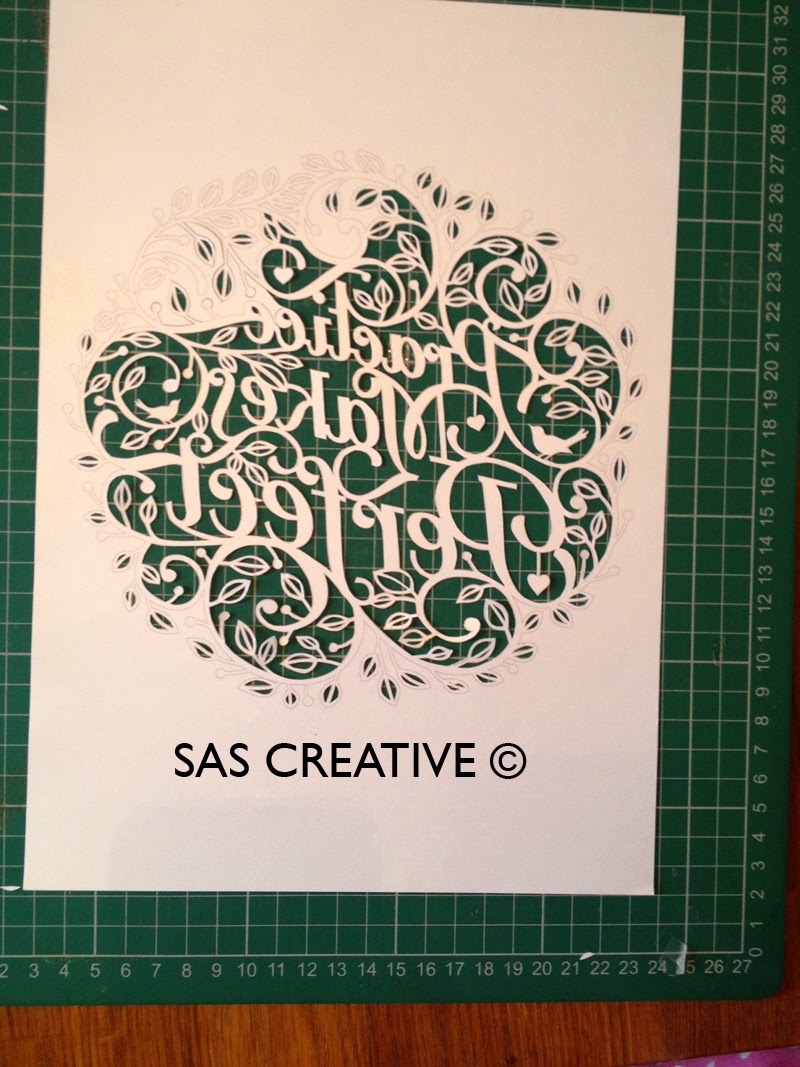
Once printed out on paper of your choice (I use 120gsm thickness) you can start cutting it! I use a Swann Morton No.3 handle and No.11 blade (sometimes 10a). Cutting the small leaves first and slowly making your way round the design so the final piece to cut is the outline. Here are a few progress shots.
Most designs generally start with setting out the type on the middle of the page. I usually choose a typeface I'm particularly passionate about at the time (I love curly swirly typefaces and always looking to add to my collection!) So at the moment its Breathe Pro (available from myfonts.com).
Then I will start designing around the type. I normally have the design in my head but sometimes I just let the pencil flow (yeah ok that sounds a bit daft but really it does work!). Changing the swirly endings to the letters helps to join up the letters that seem to float and aren't connected in anyway, but also just adding a simple 'bridge' helps to keep everything together.
After spending about an hour with the pencil I will then scan it in and start tracing the design in Adobe Illustrator. Here I can control the line thickness, add my signature birds and manipulate the type so any final pieces join up where needed. Using the path finder tools and converting all type to outlines I will then join everything together so I have an outline to cut from. This can then be converted into a file for the Silhouette Cameo or printed to cut by hand. In this tutorial I will be showing you how to cut it by hand.
Once printed out on paper of your choice (I use 120gsm thickness) you can start cutting it! I use a Swann Morton No.3 handle and No.11 blade (sometimes 10a). Cutting the small leaves first and slowly making your way round the design so the final piece to cut is the outline. Here are a few progress shots.


I hope this makes sense to all my readers. I have to say its hard writing down your own thought process and making it coherent enough for people to follow. I can't really advise of 'how' you design, that bit you have to figure out yourself. All I say is don't copy others but take inspiration from their work, don't use elements from other designs but draw your own. Inspiration is around us everywhere we look, not just in other papercut designs. Enjoy.
This design will be available to purchase soon from my etsy shop if you fancy giving this craft ago. It will also be available as a .svg file for all those who love working with the Cameo. I'll do another tutorial soon on that process of cutting!
Subscribe to:
Posts (Atom)


