As promised here are the full instructions on how to make the layered nutcracker baubles. Templates available from the
Silhouette Store, Etsy & Lori Whitlock
You will need:
Good quality paper stock (I used 120gsm pearlised paper) in your chosen colours
Craft Knife
Ribbon
Silhouette Cameo cutting settings
For the 120gsm paper I used a premium blade, Speed 7, Depth 18, Blade on 2.
1. Before we commence this project you will need to measure your bauble’s diameter so we can resize the artwork to fit. We are going to place the layered papercut piece into one half of the plastic bauble decoration, so measure the diameter of the front half of the bauble with the recess on the inside.

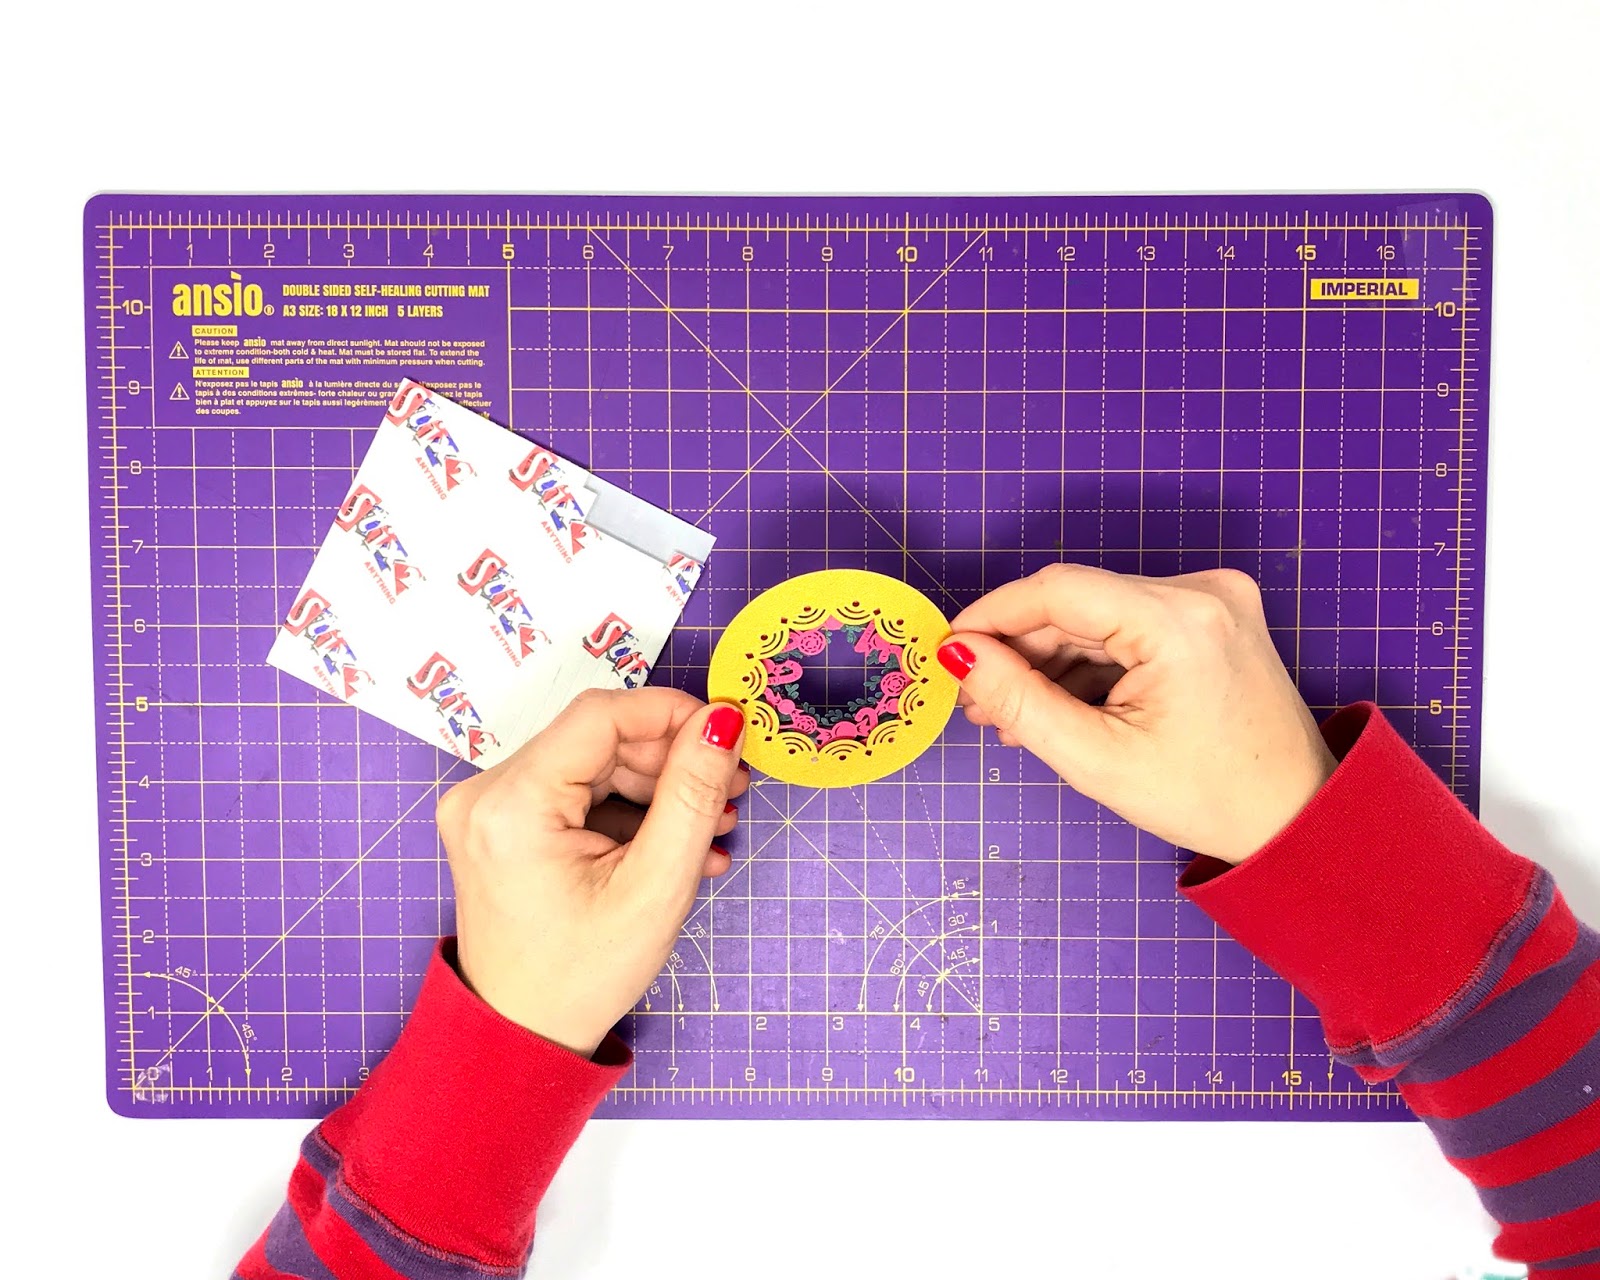
2. In the Silhouette Studio software select which nutcracker design you want to cut out and add to your cutting mat. Select and resize to the measurements of your bauble.
Ungroup all layers, Object > Ungroup, and select the circular layer with the middle cut out. Cut this layer on your Silhouette Cameo to check that it fits your bauble, it should fit snug in the recess of the front half of the bauble.
3. Once all your layers are ungrouped and you have decided which paper colours you want to cut from, place each layer on your cutting mat and cut on the Cameo. Some weeding after cutting will be needed due to the intricate design. I omitted layer 9 (the small circle of blue) as I wanted the glitter in the baubles to sparkle behind the green foliage layer.
4. Using the sticky foam pads start by adding them to the green foliage layer and place the pink candy and sweets layer on top.
5. Continue adding the foam pads to each layer, adding the gold layer followed by the white Nutcracker layer and place on top of each other.
6. Using your glue pen, affix the red intricate front circular frame to the turquoise layer. Add glue to the turquoise ribbon and nutcracker name plaque. This can now be affixed to the front of the circular frame.
7. Turn over and add foam pads to the back of the frame and affix on top of the nutcracker layer.
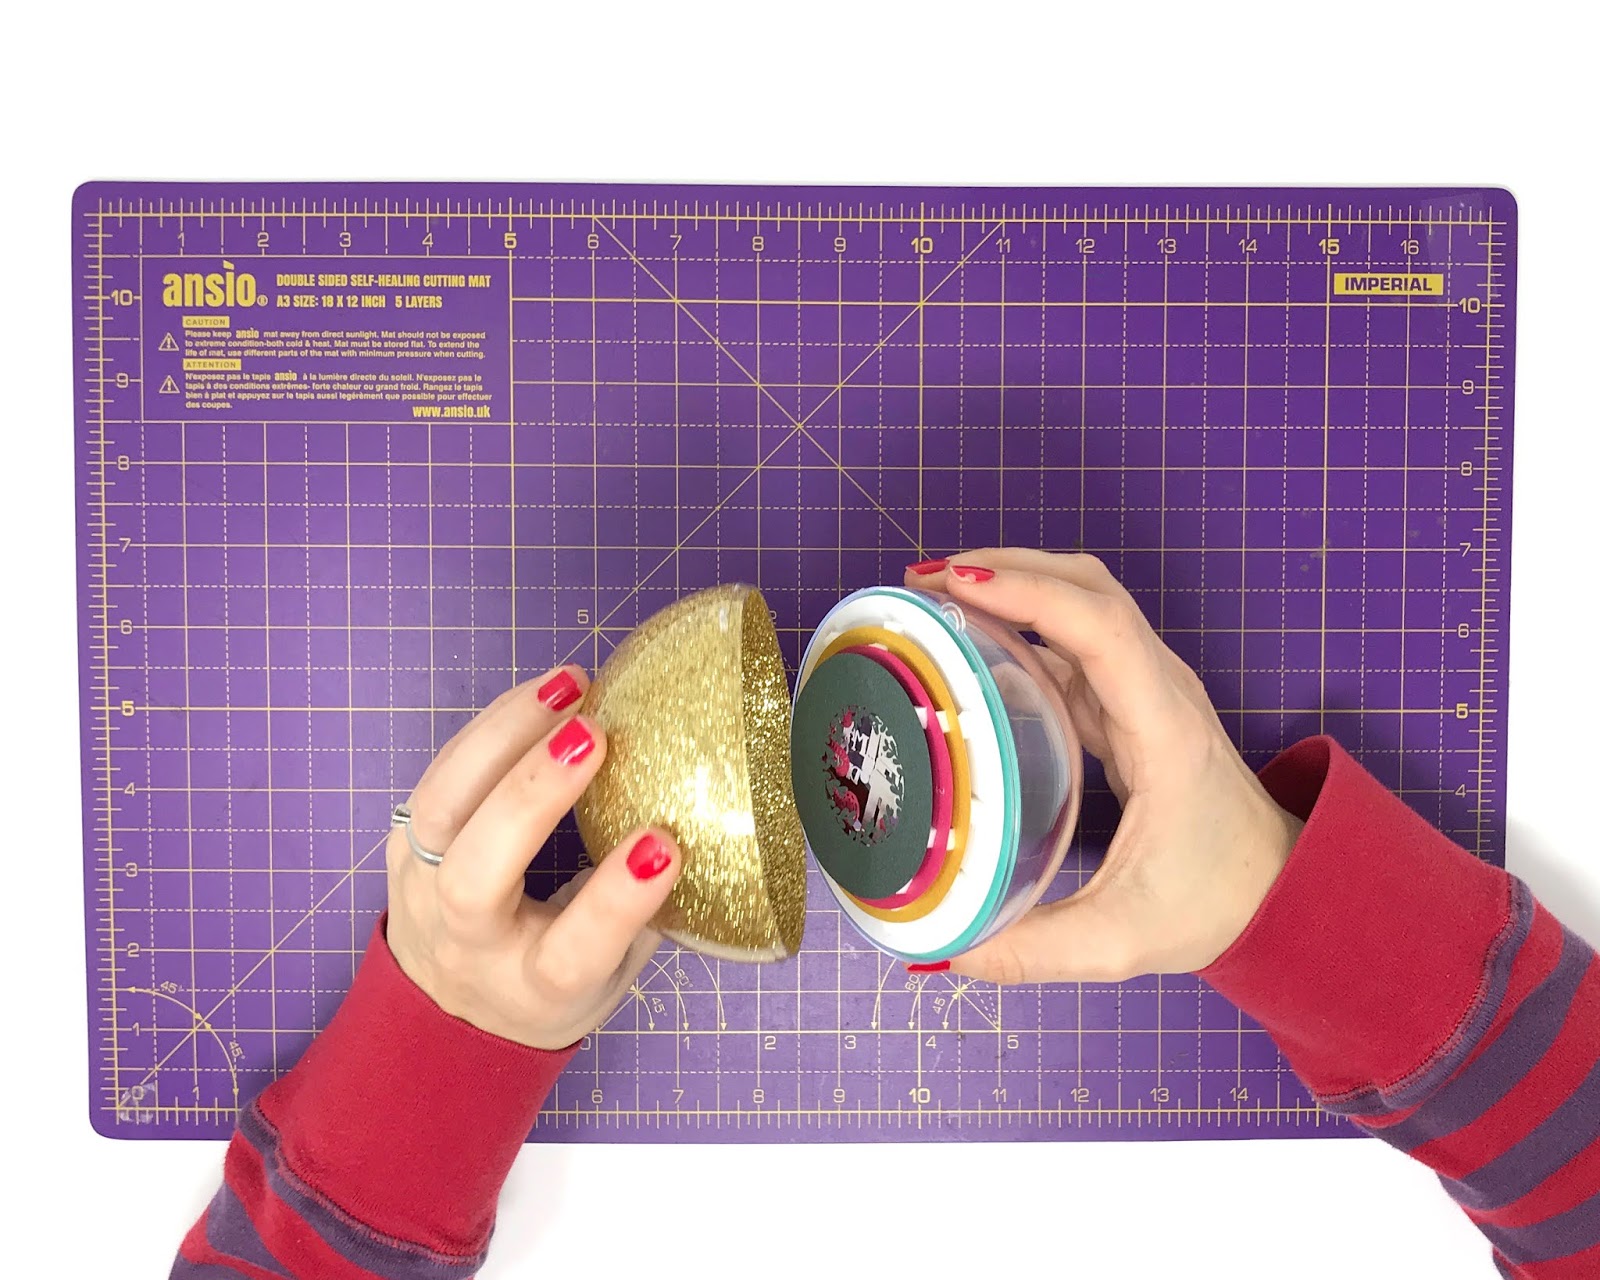
8. You are now ready to place your layered papercut into your bauble. This should fit nicely into the recess we checked at the beginning.

9. Clip the back half of the bauble together with the front, securing the papercut into place.
10. Add ribbon to hang your bauble up.
Top Tips:
For a 100mm bauble I cut the design out at 97mm (3mm smaller to fit snuggly inside the recess of the bauble). This will vary depending on your brand and make of bauble so please do check and cut a test layer before continuing.
Double up your foam pads if you want more depth to each layer.
All cutting settings are for 120gsm paper, although I successfully cut each design out I did have a few that ripped on the cutting mat, this would have been due to the quality of my mat, and how new my blade was. All designs needed weeding with a scalpel after they were cut on the Cameo.
All designs have been tested out on the Silhouette Cameo only.
The baubles I used had one side covered in gold glitter on the inside. These have since sold out, but I had a go at making them myself with fine glitter and PVA glue and got the same effect. Having one side covered in glitter hid all the back of the papercut where you could see all the layers.
I should point out that I omitted layer 9 as I wanted the glitter in the baubles to sparkle through the middle.
Please note all measurements are in mm and paper weights in gsm. For US measurements I have listed below a conversation chart from Google:
120gsm UK paper weight - 32lb US paper weight
100mm - Approx 4 inches
If you have further questions please email samantha@sascreative.co.uk or leave a comment below and I'll do my upmost best to help answer.
Please note these designs are copyright to SAS Creative and should NOT be copied in any shape or form. Thank you.